原地址: https://www.linuxtechi.com/htop-monitor-linux-system-processes/
htop是hop命令的一个升级版实用命令。她展示了重要的系统参数,比如正在运行的任务,pids,开机时间,平均负载,内存使用和其他重要的统计负载。在展示系统参数方面,相比于她前一个hop命令htop有更高效的组织方式和变化的色彩方案。比起文本化和繁琐的top命令htop更能让用户能直观的找到他们想要的系统度量。在这篇文章中我们会展示怎样使用大多数htop命令来检索变化的系统度量。htop能在所有的linux发行版中工作,在大多数最新的版本中htop命令默认已经被预装。展示系统度量,紧紧需要输入一个简单的htop命令即可
htop
htop命令的区域
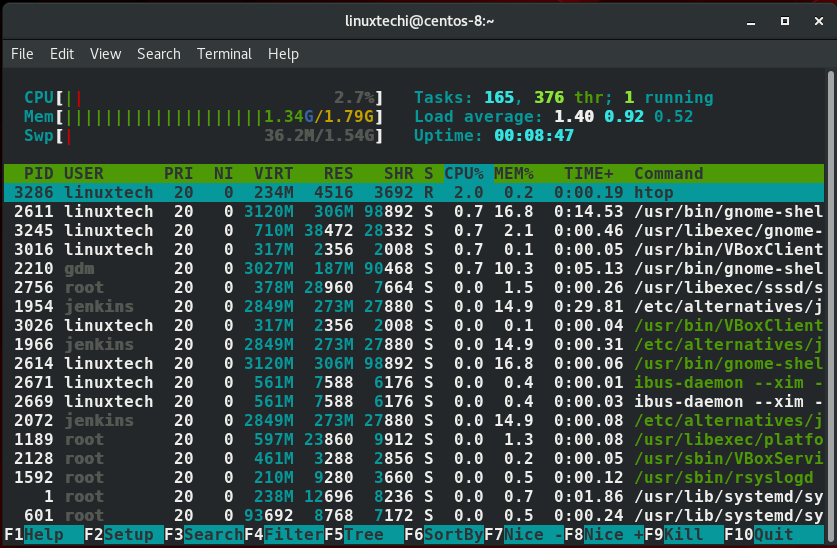
从刚刚的照片输出中,我们能清楚看到htop展示了3个区域:
头部区域:
头部区域展示了系统的cpu 内存 虚拟内存使用量 运行的任务数量 平均负载和开机时间等度量。

主体:
这个区域列出了所有正在运行的进程

尾部区域:
这部分展示了htop的菜单选项

相比于top命令htop命令包括如下高级用法
1. 能使用鼠标与htop命令交互.
2. 系统度量都用颜色标示能让你更容易的辨别.
3. htop提供了不需要引用pid就能杀死进程的方式.
4. 你能使用鼠标滑上滑下也能使用上下键来查看所有运行的进程.
在没有安装htop命令的系统中你可能会得到一些警告消息,下面是一下安装htop命令的方法:
For Debian/ Ubuntu/Mint
apt install htop
For RHEL / CentOS
yum install htop
For Fedora 22 and later
dnf install htop
htop命令使用
现在让我们换个档位,看看htop实用工具提供的各种选项
排序输出
htop提供多种选项来对你的输出内容进行排序。使用F6功能键就能查看输出选项。在出来的左边选项中,滑动选择你想要对输出排序的条件,默认情况下是使用 PERCENT_CPU 选项。
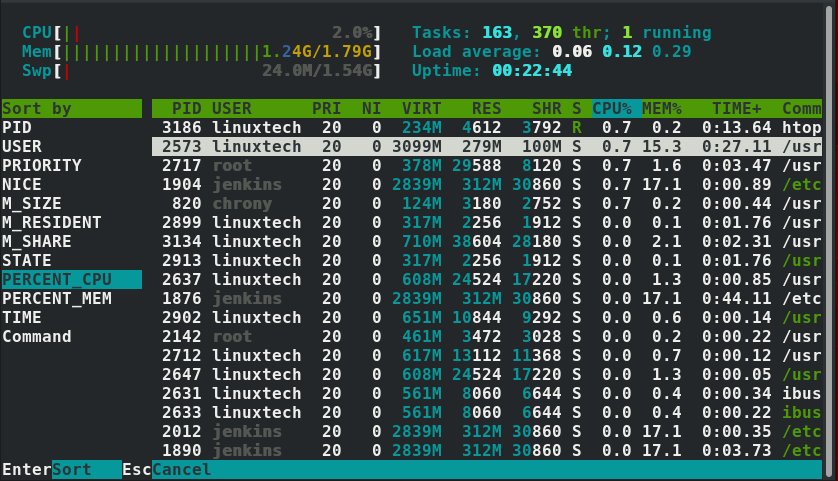
如果想使用内存使用率排序,就用下滑键选择 PERCENT_MEM 选项
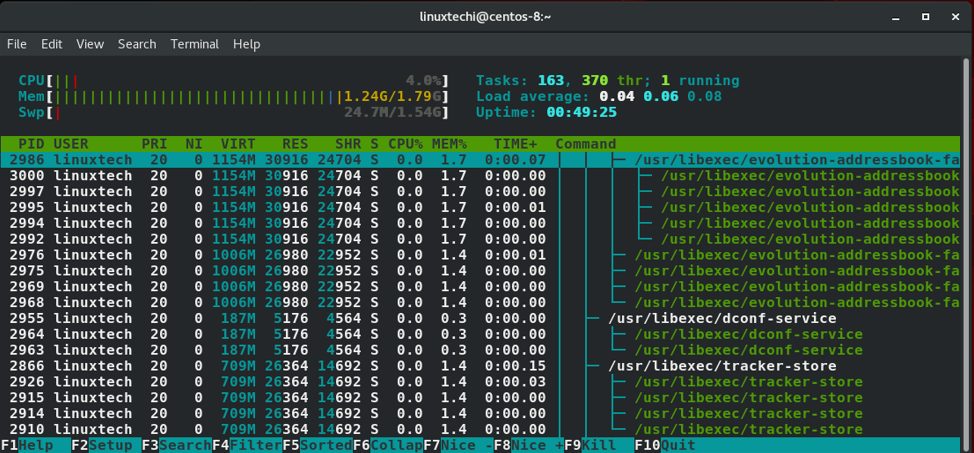
以树形的格式列出进程
linux进程通常都是层级顺序,会创建子进程,如果想显示子进程,按F5功能键就可以了。
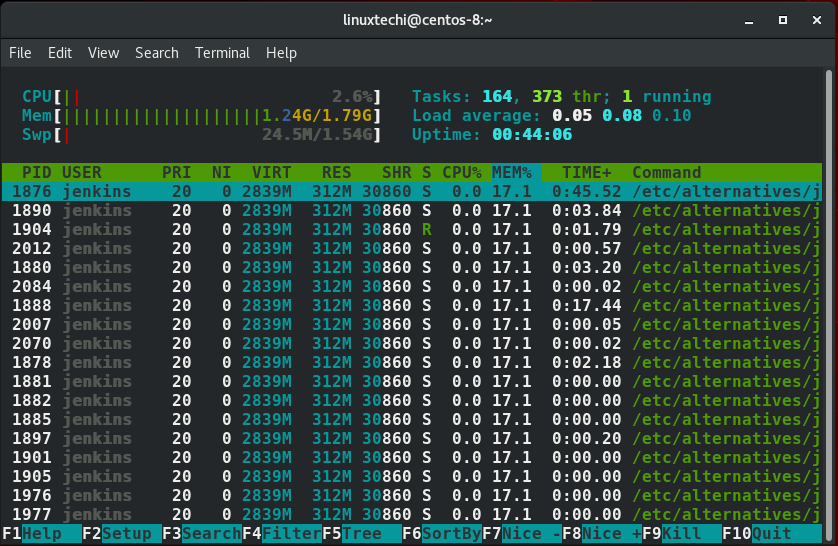
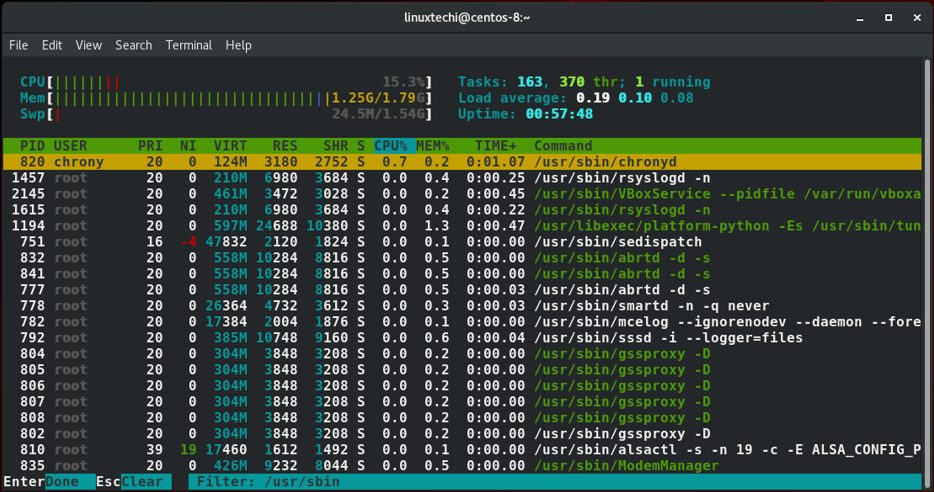
过滤进程
linux进程能依照他们各自的路径进行过滤。按下F4功能键就能过滤。这时就能在底部区域输入进程的路径。在下面的输出中。我展示了/urs/sbin这个路径的进程。
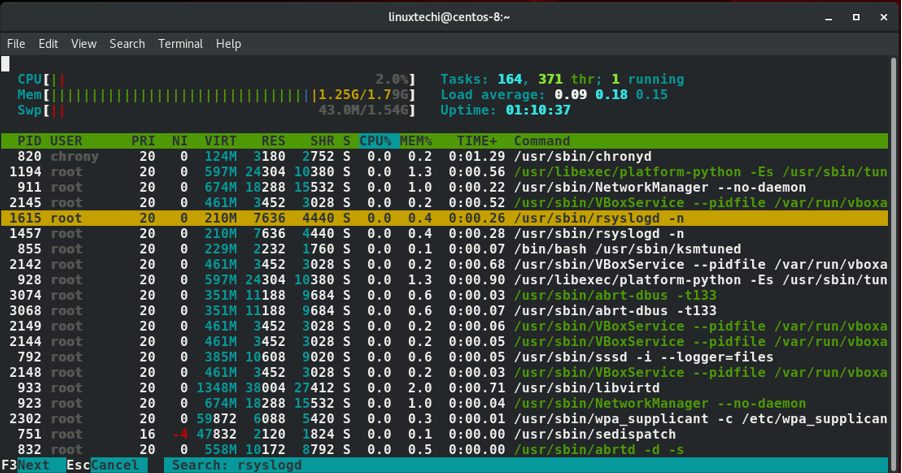
搜索进程
按下F3功能键之后你就能在终端的底部屏幕出现的区域输入进程的名字进行搜索。举例来说,在下面这个例子中,我输入了rsyslogd进程在 /usr/sbin路径中,找到之后进程就会以黄色高亮显示。
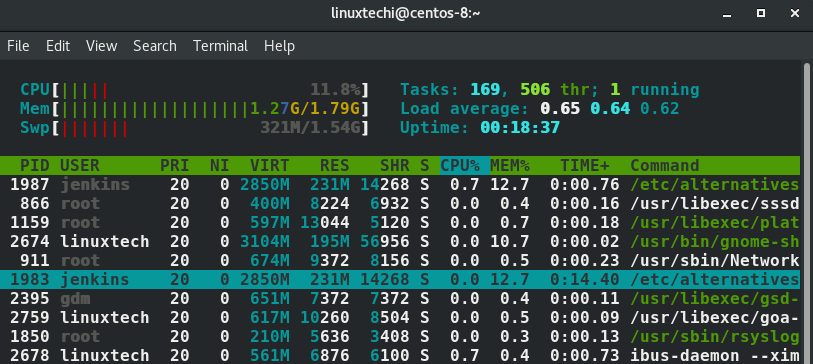
杀死一个进程
登陆htop之后滑动到你想要结束的进程上面。在这个例子中,我选择了jenkins,她的pid是1983
下一步,选择F9或者字母k之后就可以选择你想要发送的信号。在这个例子中,我选项了SIGKILL 来确保这个进程退出
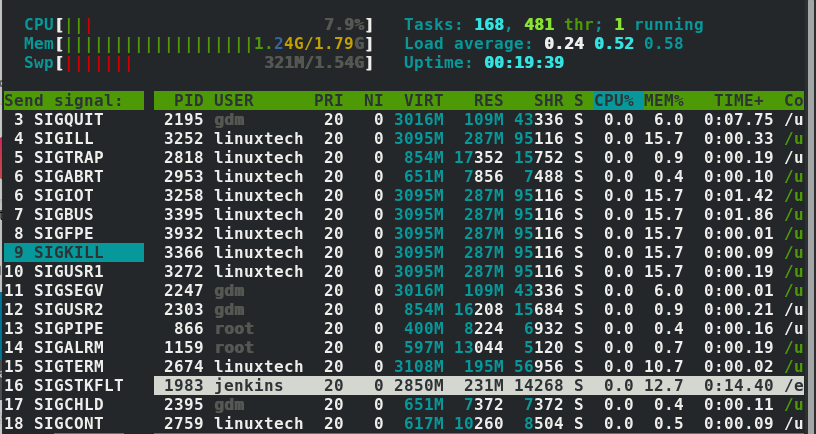
最后按下 ENTER 键
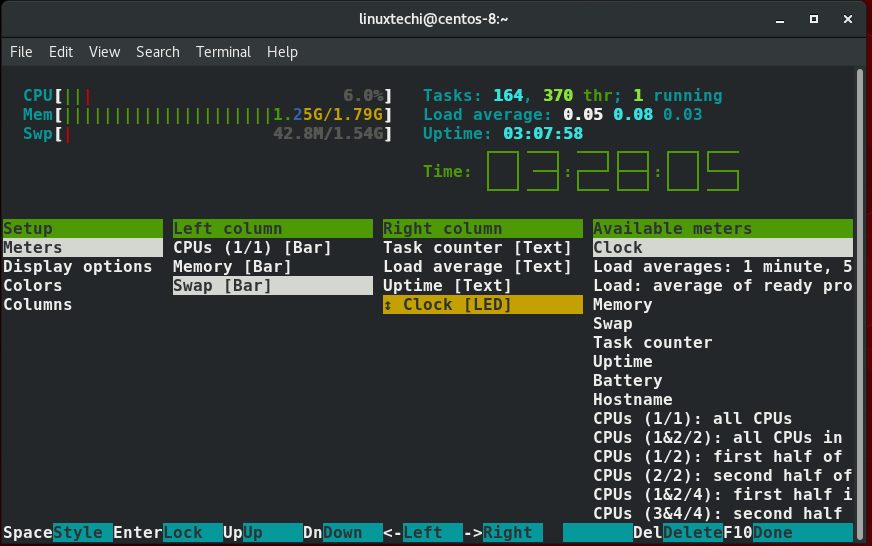
怎样定制htop的输出
做一个微调就能确定你以怎样的格式输出,按下F2健。有几个选项可以改变例如颜色,字体样式,系统参数等等。
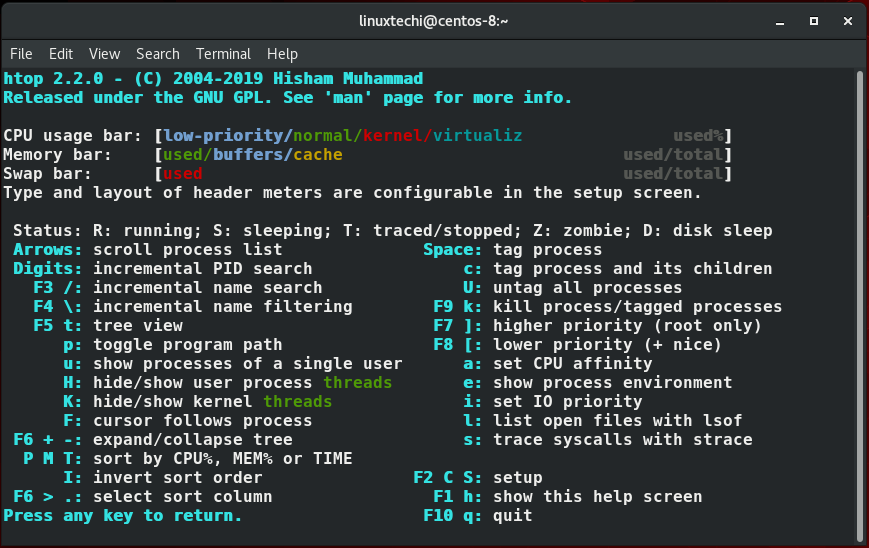
获得帮助
要获得有关如何使用htop查找路径以及如何最佳利用其中各种快捷方式的帮助,只需按F1键。各种快捷键列表和它们的作用将显示如下所示。
这就把我们带到htop命令这个主题的结尾了。欢迎评论并与你的朋友分享